Help section for AL Dimension Categories
HOW TO SET UP AL DIMENSION CATEGORIES
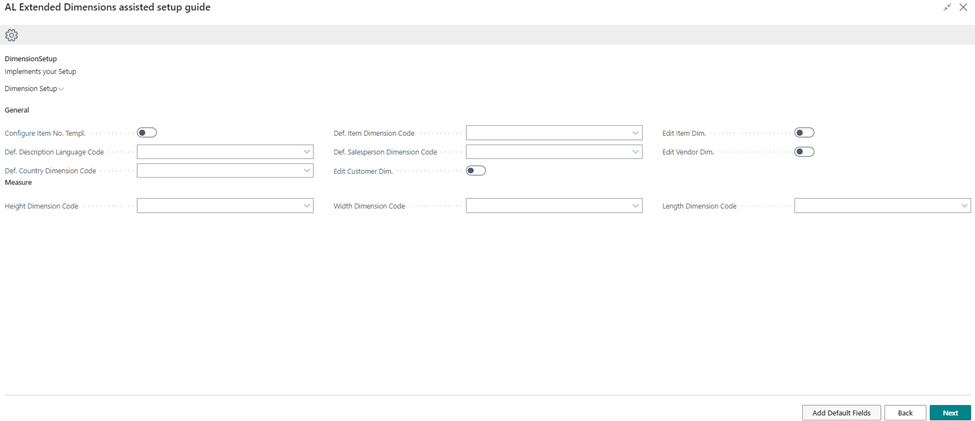
Enter the page Dimension Setup and click on Assisted Setup, the page will display four options that can be flagged, according to your needs.
- Config. Item Templ.: to enable the creation of new items through templates
- Edit Item Dim.: to modify the dimensions associated to an item
- Edit Customer Dim.: to modify the dimensions associated to a customer
- Edit Vendor Dim.: to modify the dimensions associated to a vendor
Click on Add default fields, if you want to set-up the fields automatically.
Press next to setup the categories' dimensions.
HOW TO SET UP THE CATEGORIES' DIMENSIONS
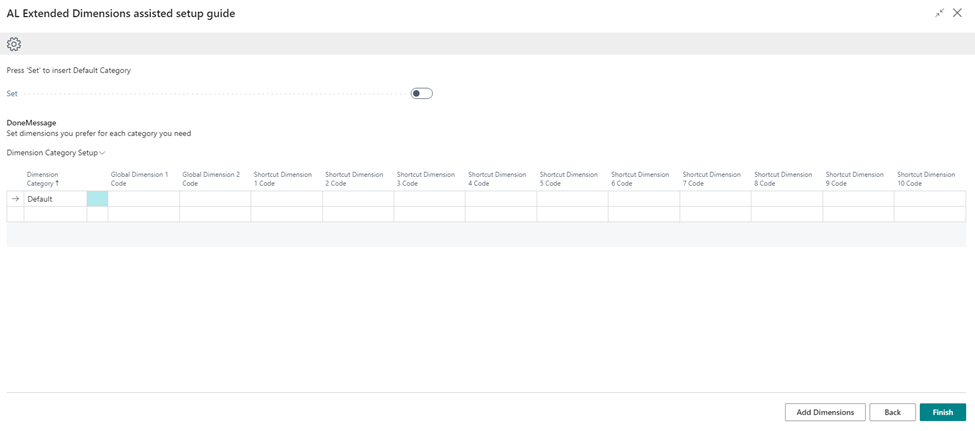
To choose which dimensions you want to assign to each category, enter the page Dimension Category Setups, click on Assisted Setup and then on Set. The system will automatically create the three default categories: product, customer, vendor. For each category add up to 10 dimensions relevant to your case.
When the setup is complete click on finish to save the changes.
You can modify these setups later on, going on Dimension setup and then on Dimension Category setups.
HOW TO CREATE NEW ITEMS THROUGH TEMPLATES
If you flag the option Configure Item Templ. , you will be able to setup new items, services and more through templates, speeding up the whole process.
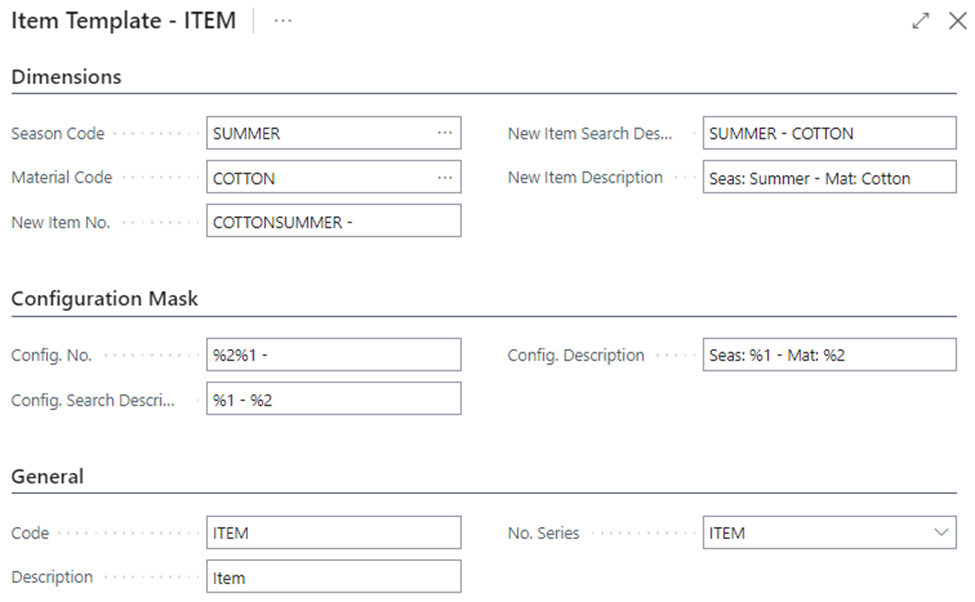
To create a new item template click on "new", the template will display the dimensions that have been set up for that category; in the example below "season" and "material" dimensions were added for the product category. Fill in the dimensions' fields with the values that apply.
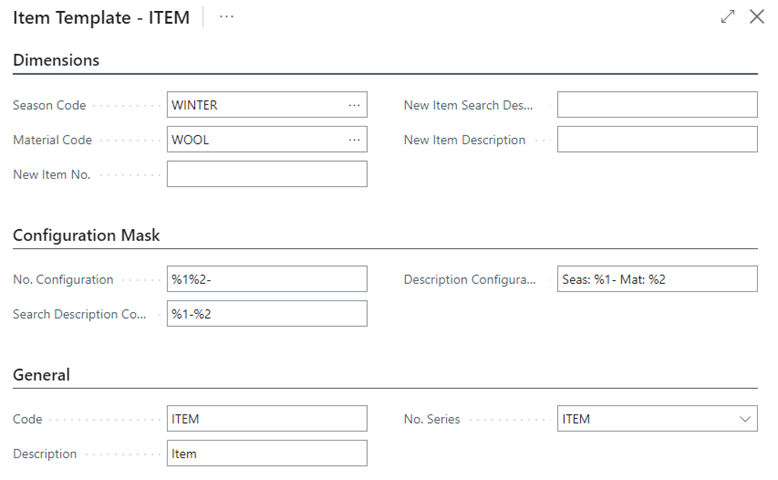
Configuration mask: This section is useful to determine which parameters you want to be taken into consideration during research and data analysis. It lets you filter through ledger entries using the item's specifics, making it easier to find all the data associated with the same dimensions and dimension's values.
You may create more combinations with the item's parameters, for example using only some dimensions values or all of them together.
To create a configuration mask with a specific dimension, simply enter "%" and the "Dimension No.".
Let's say your item is a cotton t-shirt, sold in the summer collection and you want to create a configuration mask with the dimensions "season" and "material": enter %1%2, that stands for SummerCotton. Now, to keep things clear, it is also possible to add some text and characters, for example: Seas: %1- Mat: %2 , that will result in Seas: Summer - Mat: Cotton.
Warning: make sure you insert the right dimension number, according with the order you chose during the category setup. So, in this case Season is the 1st dimension and Material is the 2nd.
You can create up to 3 configuration masks, filling in the fields Config. No., Config. Search Description and Config. Description, for example you may enter:
1. T-shirt
2. Seas:%1 - Mat: %2
3. Mat: %2
These configurations will be of aid when you need to find all the cotton items or the cotton items sold in the summer period, in your ledger entries.
HOW TO USE THE NEW FUNCTIONS OF AL DIMENSIONS
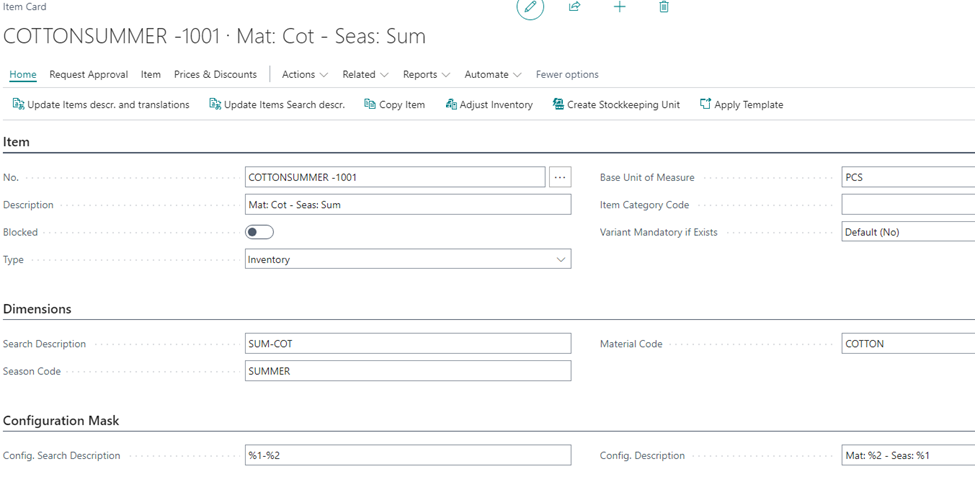
On the Item Template page click on the three dots, a menu with 3 new functions will be displayed.
- Create New Item No.: it fills in the Dimensions section showing a preview of the configuration masks, according to your settings
- Add suffix to New Item No.: it adds the set serial number to the New Item no. field
- Item Filter with default Dimension: it filters the existing items according to the set dimensions
Use the functions that you need and, if all the information is correct, press "ok".
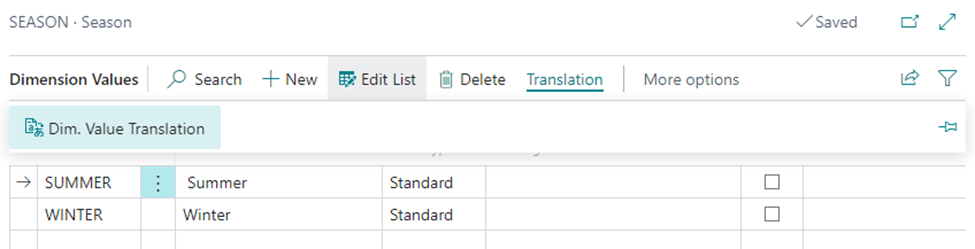
HOW TO USE THE TRANSLATE FUNCTION
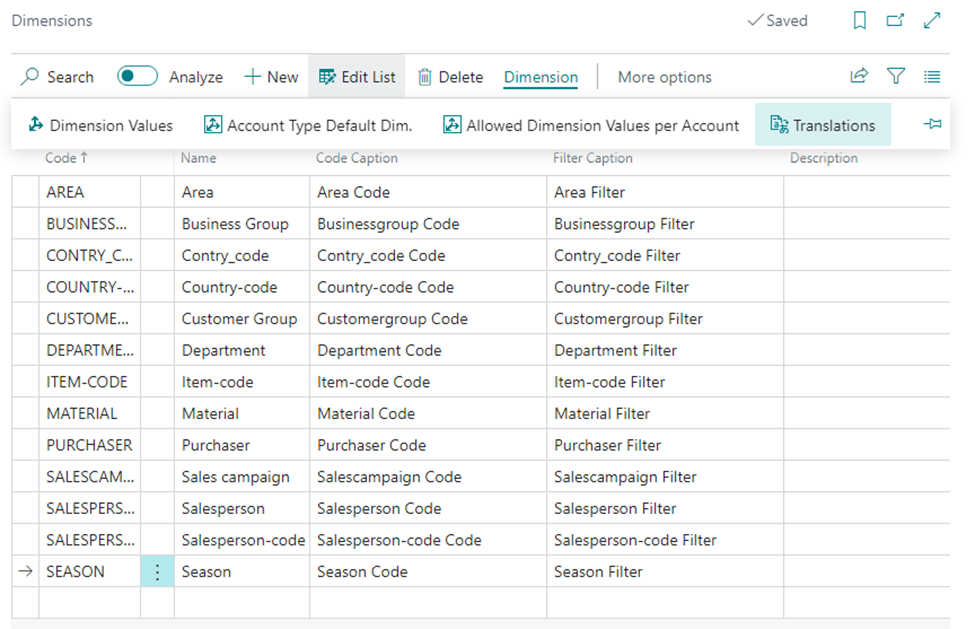
Enter the Dimensions page, select the line of the dimension you want to translate and press dimension and then the translations button.
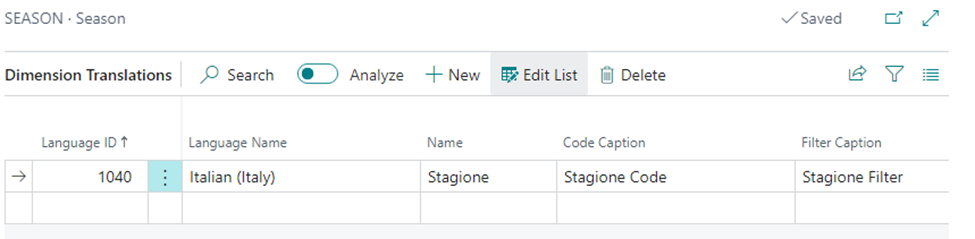
If you want to translate the dimension's values as well, click on dimension values, select the line you want to translate and press translation and then the Dim. Value Translation button.